3. Guide laser calibration
Calibrate the size and position of a guide laser.
How to calibrate guide laser
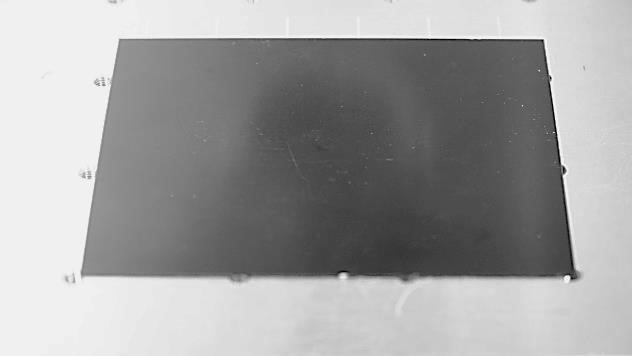
- Place the material on the work area.
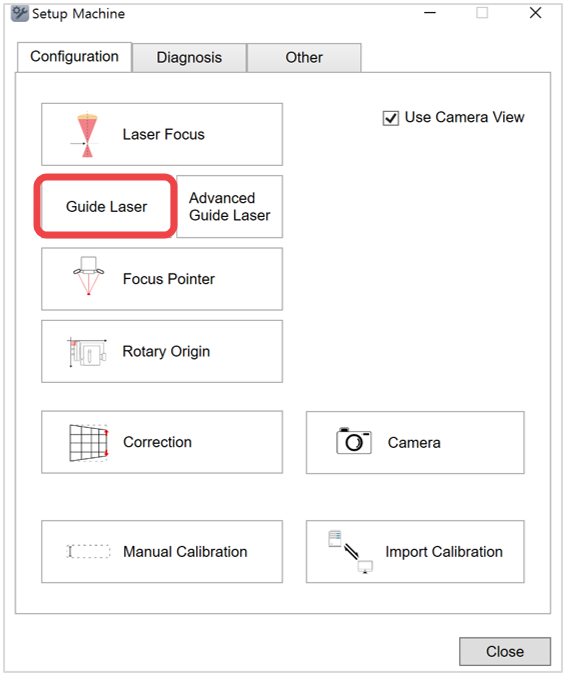
- Click Guide Laser.
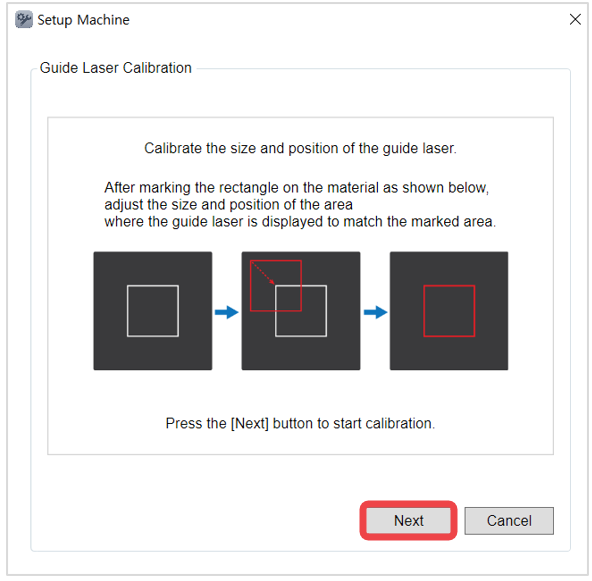
- Read the notification then click Next.
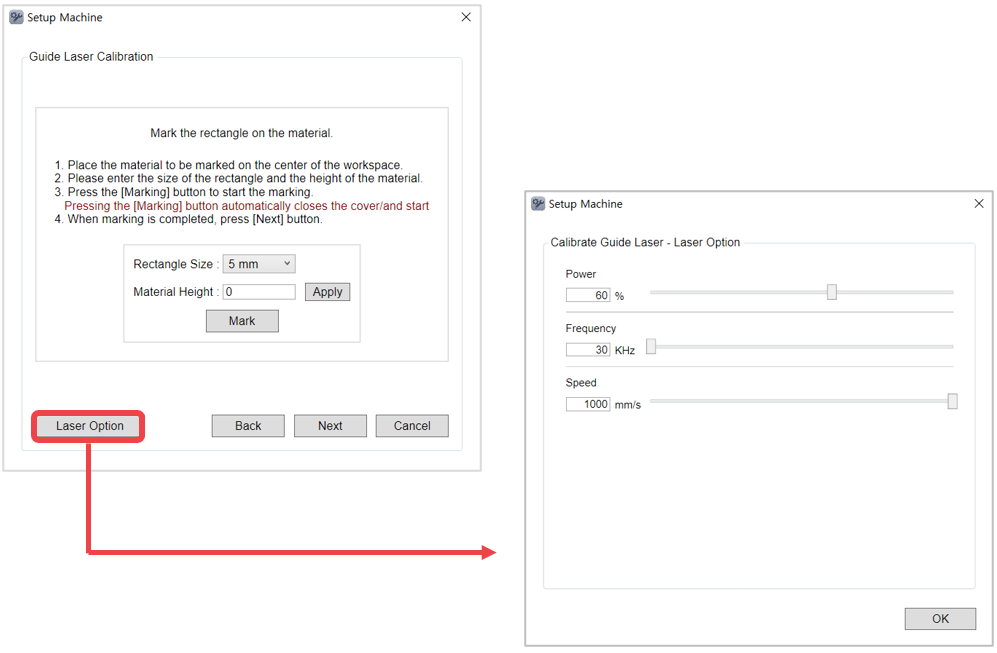
- Select the size of the rectangle then enter the height of the material (to mark a rectangle). Click Apply to set the height then click Mark. Once Mark button is clicked, the machine cover automatically closes and the rectangle is marked on the material.
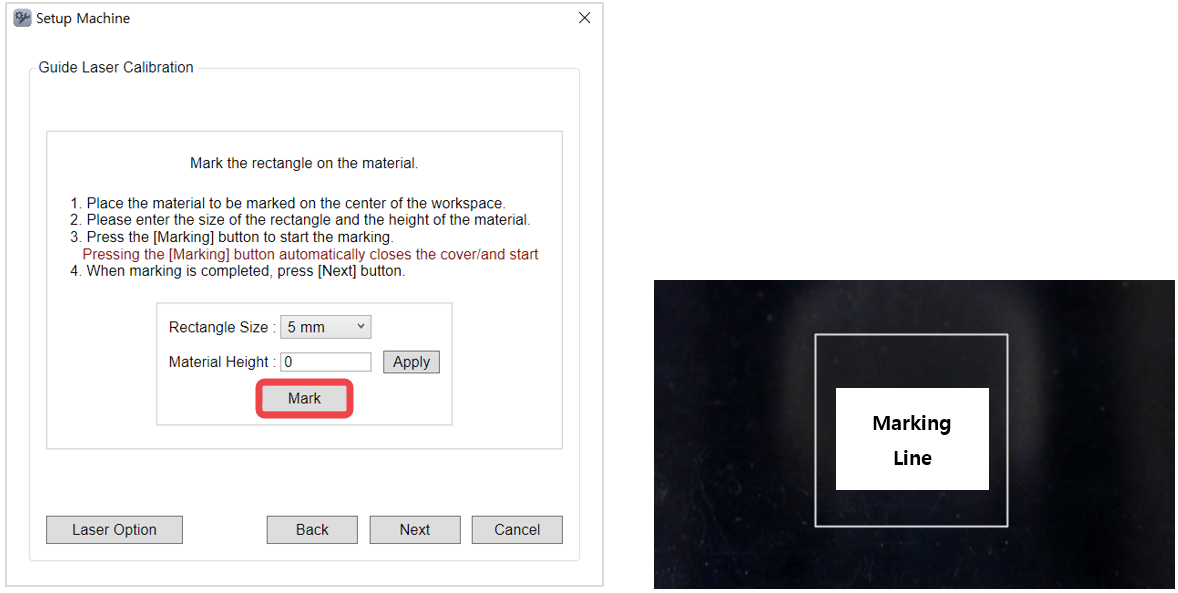
*A 20mm rectangle is marked on the material at a 0.5mm height.
- Once the guide laser appears at the end of marking, adjust the offset values, width and height to fit in the rectangle in 2. Parameter Setting then click Apply.
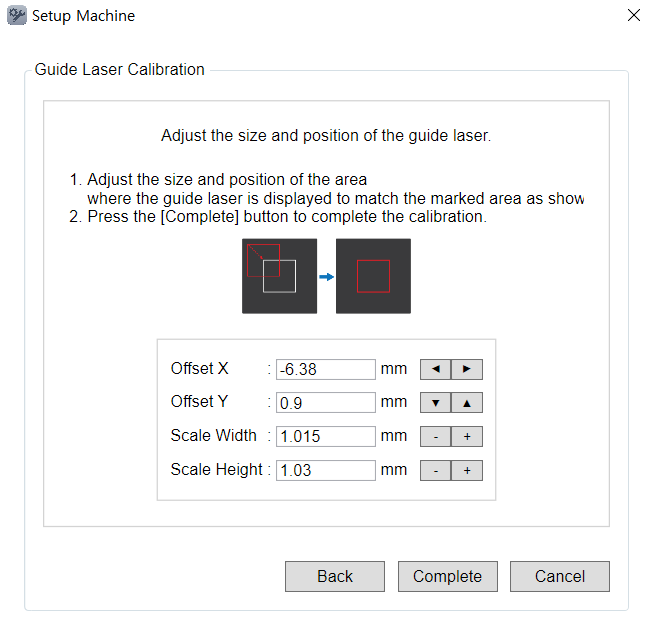
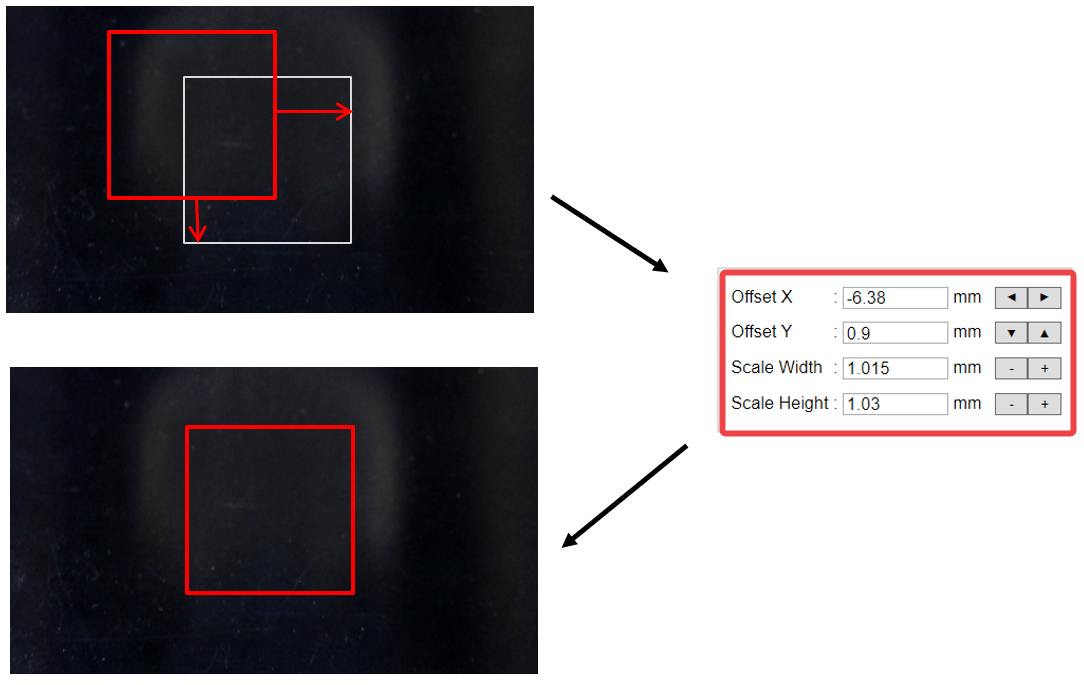
※Select Laser Option in the Guide Laser Calibration window to adjust the laser options.
Advanced Guide Laser
- In Setup Machine window, click Other.
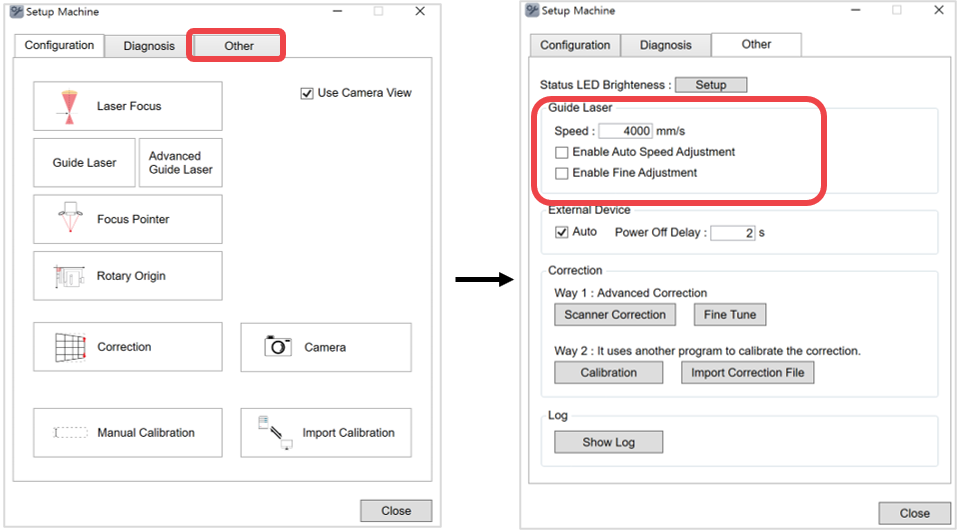
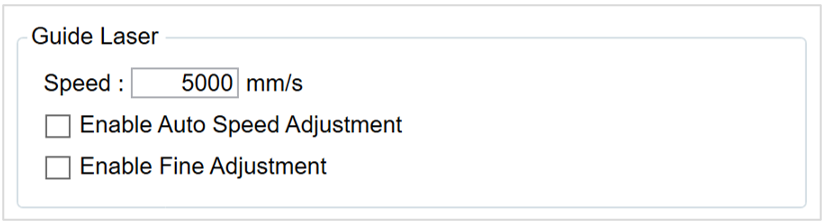
| Speed | Sets the guide laser speed |
| Enable Auto Speed Adjustment | Automatically adjusts the guide laser speed according to the size of the object to be marked when selected. |
| Enable Fine Adjustment | Automatically moves to the guide laser focus position (when checking the marking area) to enable precise marking area position when selected. ✽[Advanced Guide Laser] menu is added to the [Setup Machine] window when [Enable Fine Adjustment] function is selected and/or activated. ✽[Advanced Guide Laser] is required for calibration, and the calibration method similar to guide laser calibration method. 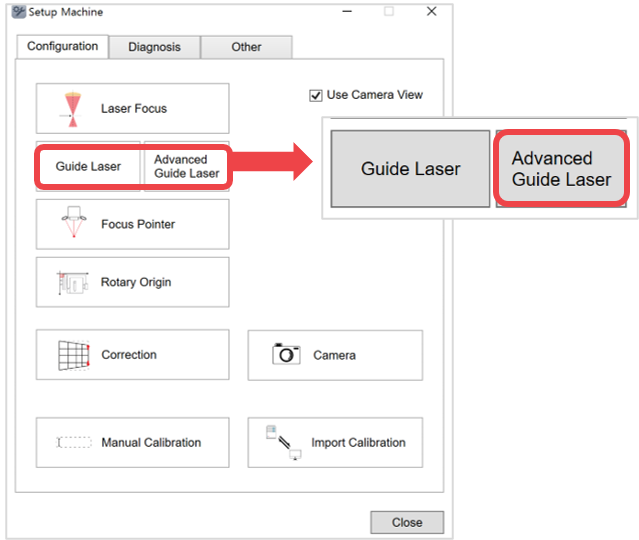 |