[MAGIC-E3] Descriptions
Contents
- 1. Machine
- 2. Clamp
- 3. Keypad
- 4. Menu
- 5. Status indicator
- 6. Tension tool
- 7. Switching tools
- 8. Spindle Belt Replacement
1. Machine
Protect your hands, wrists and fingers.
Do not put any of your body parts inside the machine or anywhere near the head during operation.

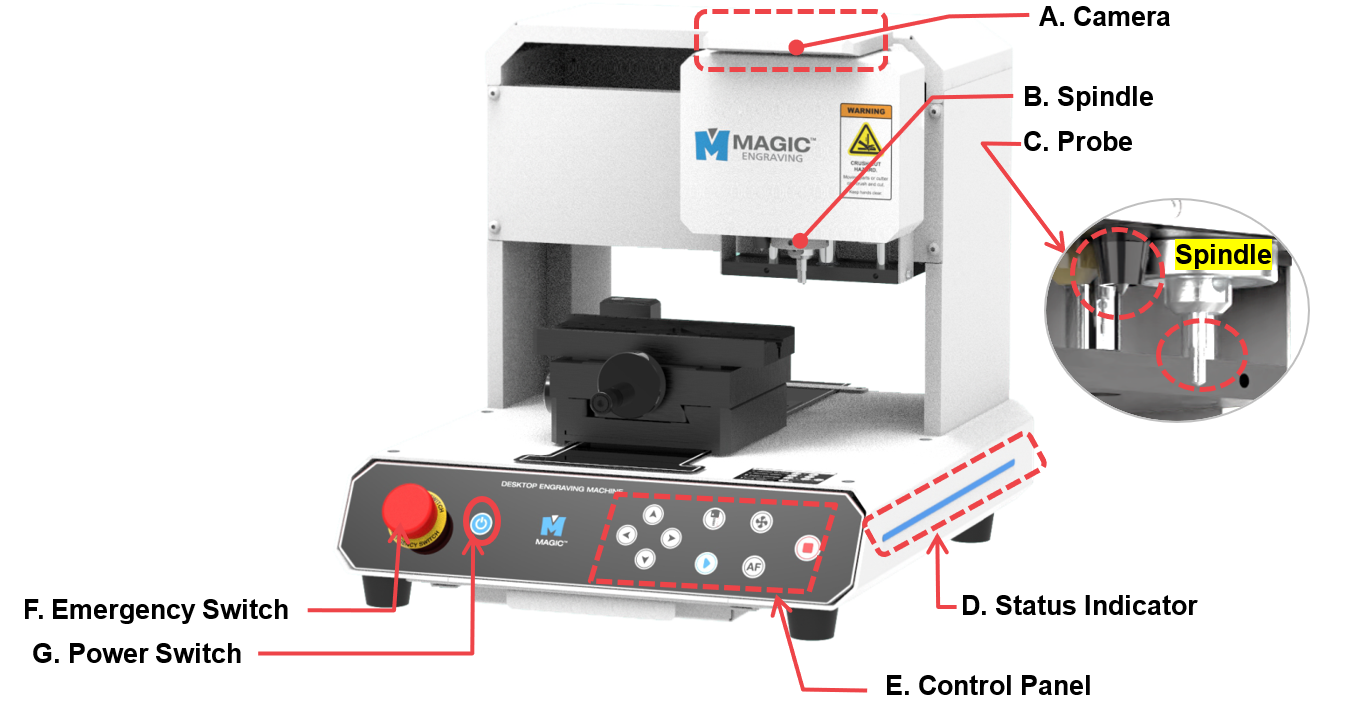
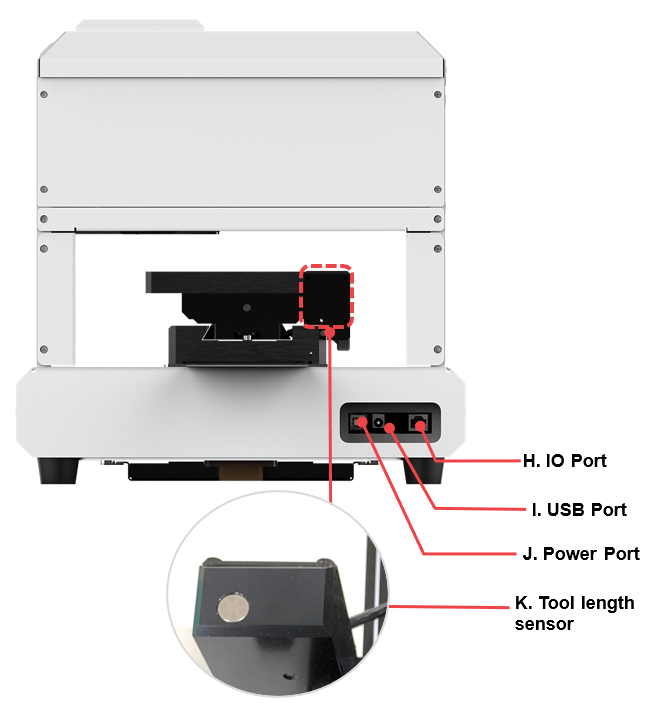
| A | Camera | Shows actual view of material to design. |
| B | Spindle | Secures the tool for engraving.
※To change tools, use a 2mm T-wrench. |
| C | Probe | Measures the height of the engraving material. |
| D | Status Indicator | Shows the status of the device via blinking interval |
| E | Control Panel | Controls the power button and the manual control for regulating engraving operations. |
| F | Emergency Switch | Stops the machine during emergency. |
| G | Power Switch | Switches the power on/off. |
| H | IO Port | To connect the dust connector. |
| I | USB Port | To connect USB cable to PC. |
| J | Power Port | To connect power adapter to supply power to the machine. ※Use a grounded outlet only. Do not plug the machine into an ungrounded outlet. |
| K | Tool length sensor | Automatic tool length measurement sensor. |
2. Clamp
1) Flatbed Clamp
Place the material on the flatbed then secure it by using the clamps provided (see clamps below). The clamps are used to secure the material to the flatbed so that the material stays in place during engraving or cutting process. The number of clamps to be used may vary depending on the size and/or shape of the material.
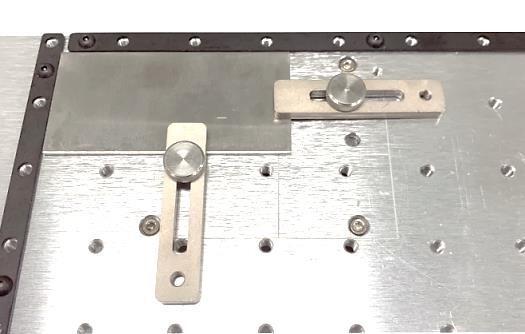 ※See picture for reference.
| L-wrench(4mm) (CP-L40) |
 |
1EA | For tightening/unscrewing the bolt. |
| Push clamp | 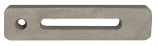 |
2EA | To hold materials in place. |
| Push clamp | 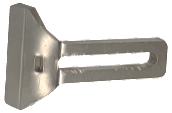 |
2EA | To hold materials in place. |
| Knob (M5x12mm) |
 |
2EA | To secure the clamp set. |
| Knob (M5x25mm) |
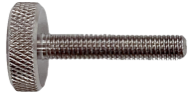 |
2EA | To secure the clamp set. |
| Knob (M5x30mm) |
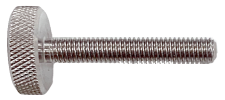 |
2EA | To secure the clamp set. |
| Knob cap | 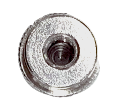 |
2EA | Cap for knob: Used with **M5x25mm knob.** |
| Bolt (M5x10mm) |
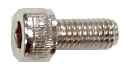 |
5EA | To secure the clamp set. |
| Bolt (M5x18mm) |
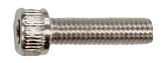 |
5EA | To secure the clamp set. |
How to secure the material with press clamps
For thin material:
Both press and push clamps can be used to secure thin materials. Use the knobs to attach the clamps to the flatbed. Screw the knobs down to the flatbed to secure the material in place. Take note that the position of the clamps and the number of clamps to be used may depend on the size and shape of the material. It may also depend on user’s preference.
|
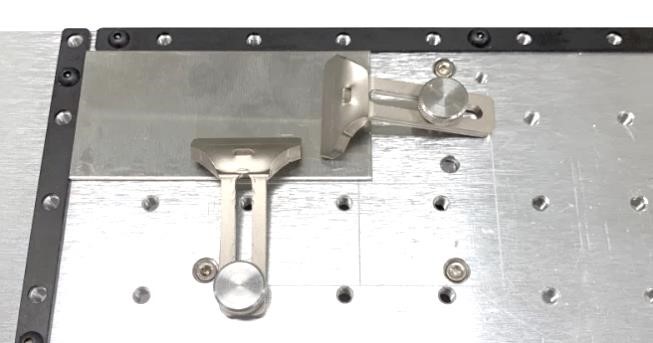 |
| Press clamp with knob | Push clamp with knob |
For thick material:
- Assemble the press clamp. Insert the M5x25mm knob into the hole of the press clamp then screw the cap.

- Place the material on the clamp.
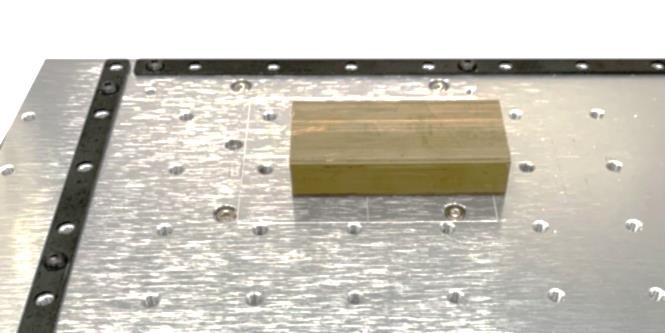
- Place the assembled press clamp on top of the material (in a horizontal position). The clamp must be placed on the same level as the material surface.
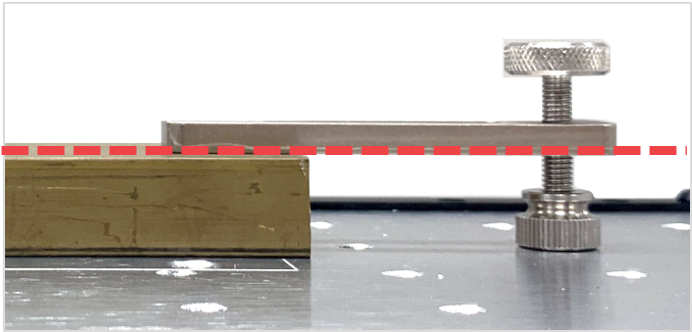
- Attach the press clamp to the flatbed. Insert the M5x30mm knob into the press clamp then screw the knob down to secure the material to the flatbed.
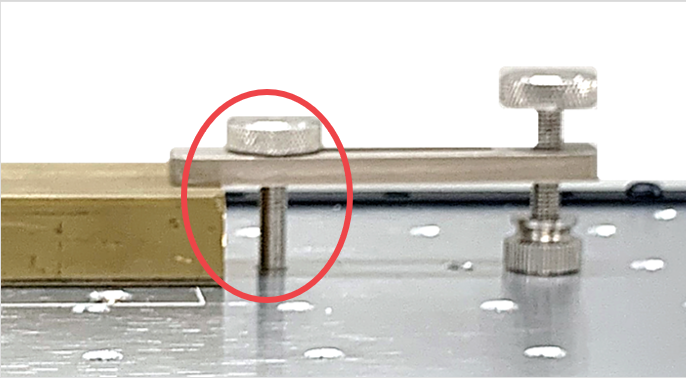
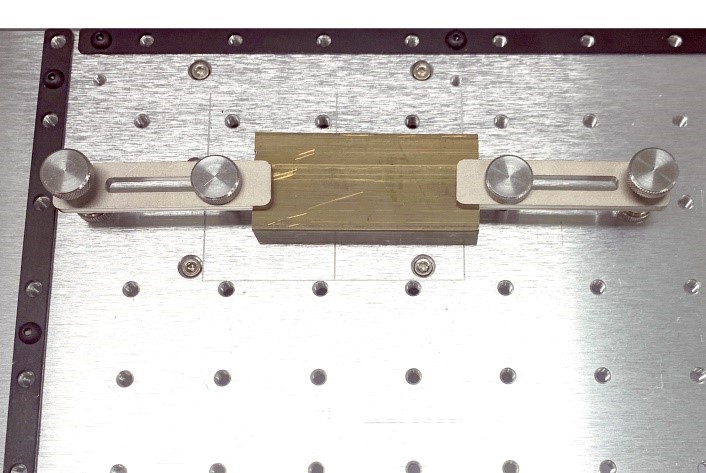
- Secure the sides of the material. Use two or more clamps to secure the material. Be sure to screw the knobs down to the flatbed so the material stays in place.
2) Multipurpose Clamp
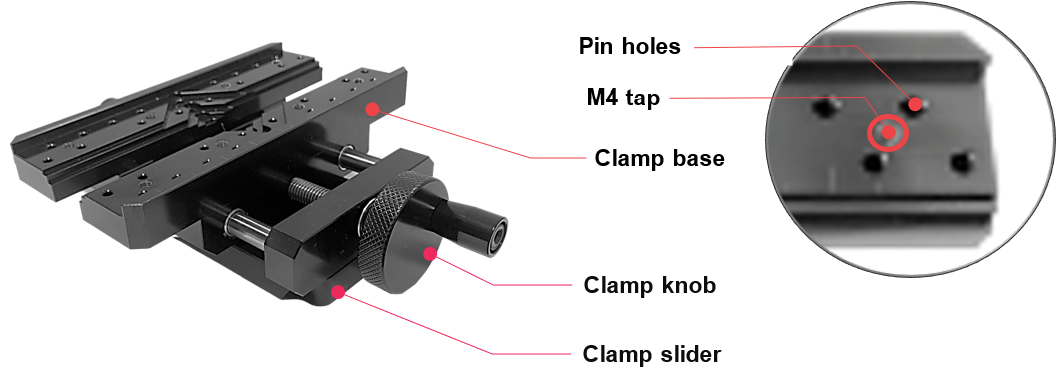
The package includes a multifunctional clamp that is easily assembled, disassembled and transformed into 3 different types of clamps. It can be adjusted according to the height of the material, and can be expanded according to the material’s thickness, size, and shape. This single clamp alone makes engraving on various materials possible without the use of any additional clamps.
How to secure the material in place
Use the clamping knob to secure your material in place. To loosen or widen the clamp, turn the clamping knob counterclockwise; to fasten it, turn the knob clockwise.
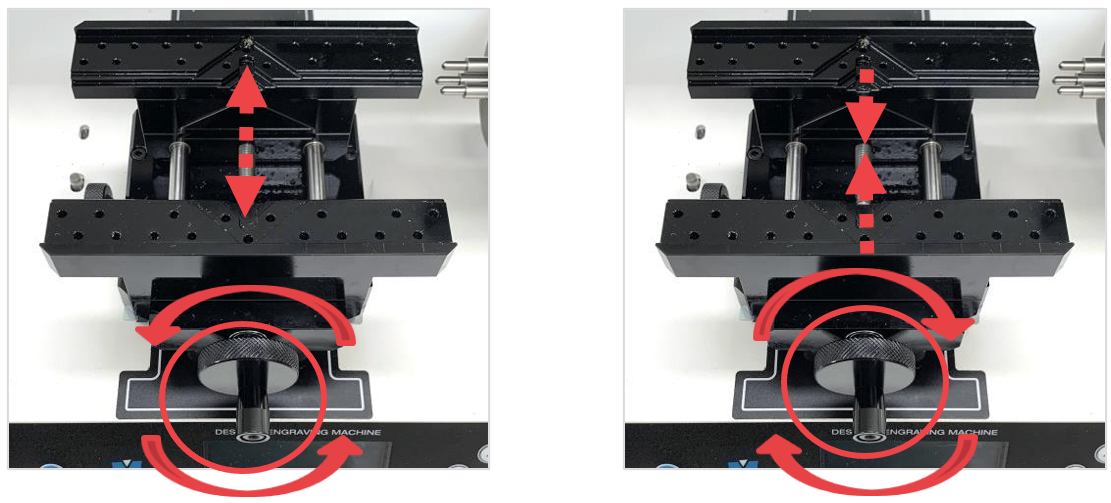
Marks may be left on the material if fastened tightly.
How to position the material
Use the vertical ruler bar as an alignment guide to help you position and align your material to the clamp with ease and accuracy. Properly place your material on the clamp then check the alignment.
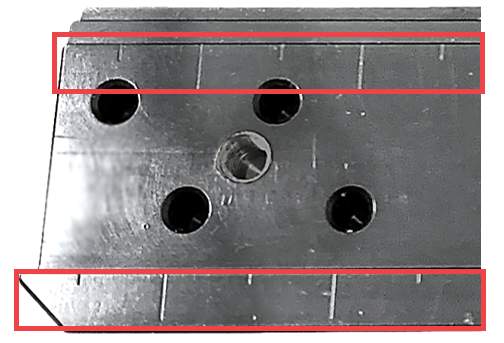
How to secure the material with irregular shape in place
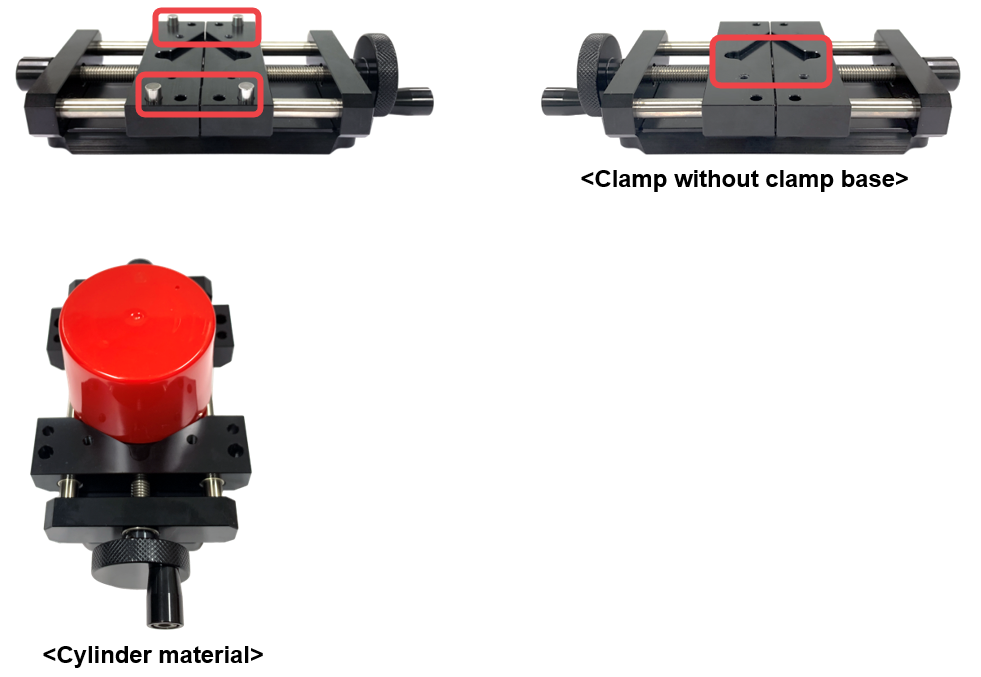
Use the clamping pins to firmly hold materials with irregular shapes in place. To secure the clamping pins to the clamp, simply insert the pins into the pin holes then fasten them.
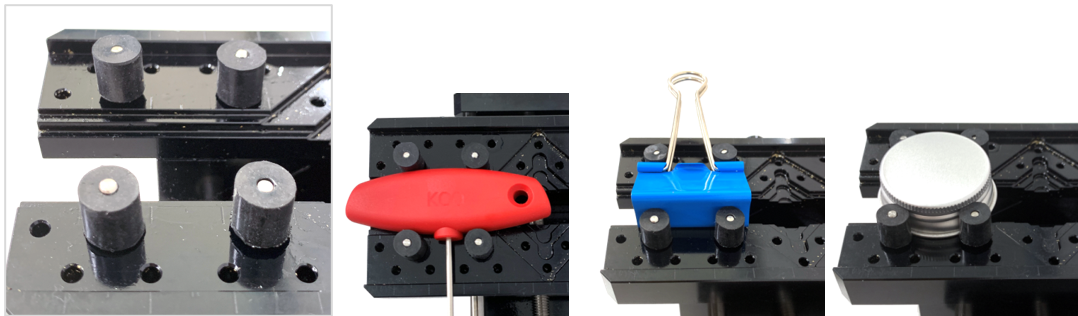
How to adjust the height of the clamp
Below are instructions on how to adjust the height of the clamp according to the thickness of the material.
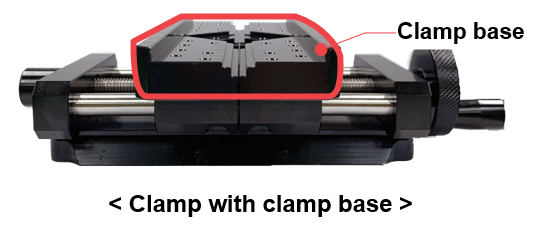
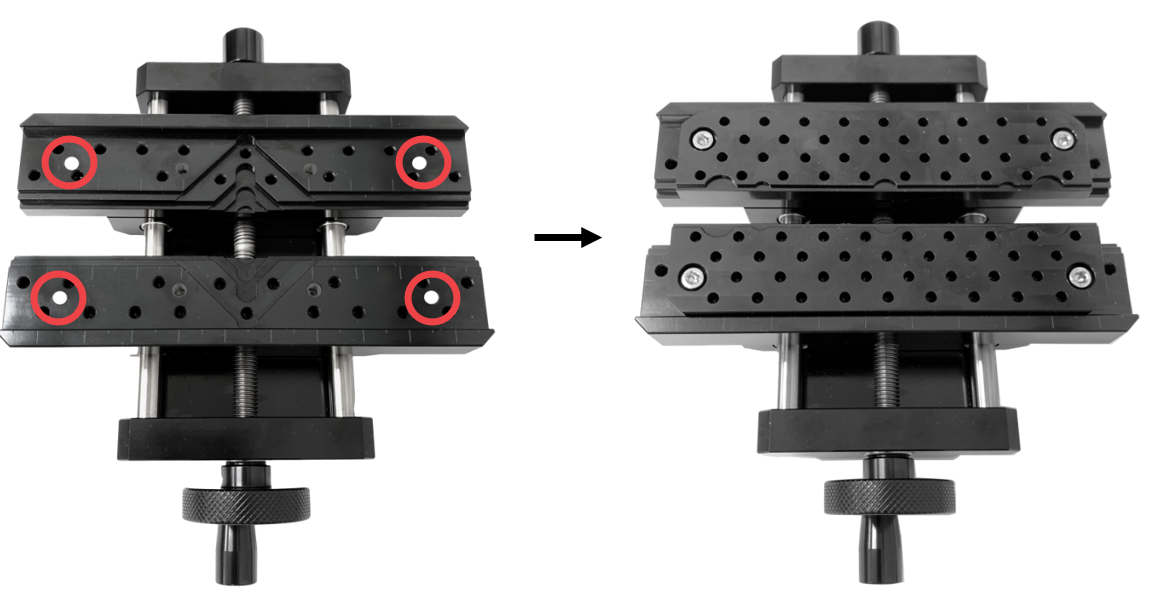
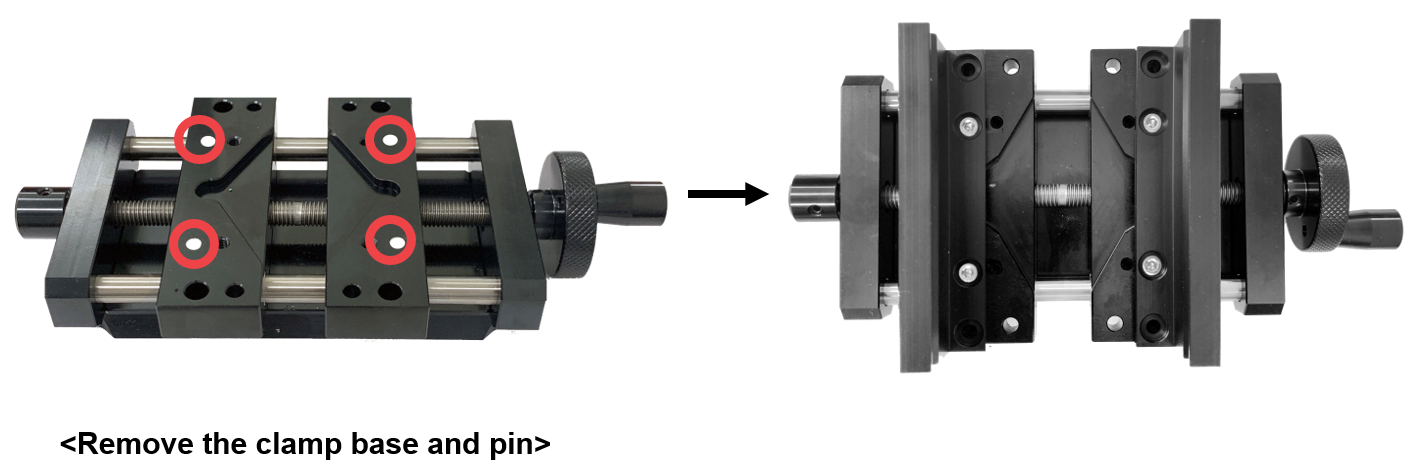
- Turn the clamp over (to the back) then screw the bolts (M4x20mm). ※Use a 3mm L-wrench to screw the bolts.
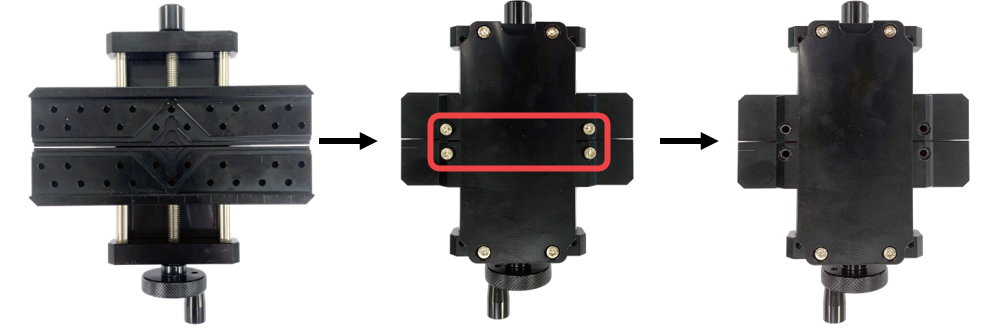
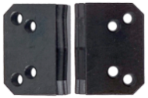
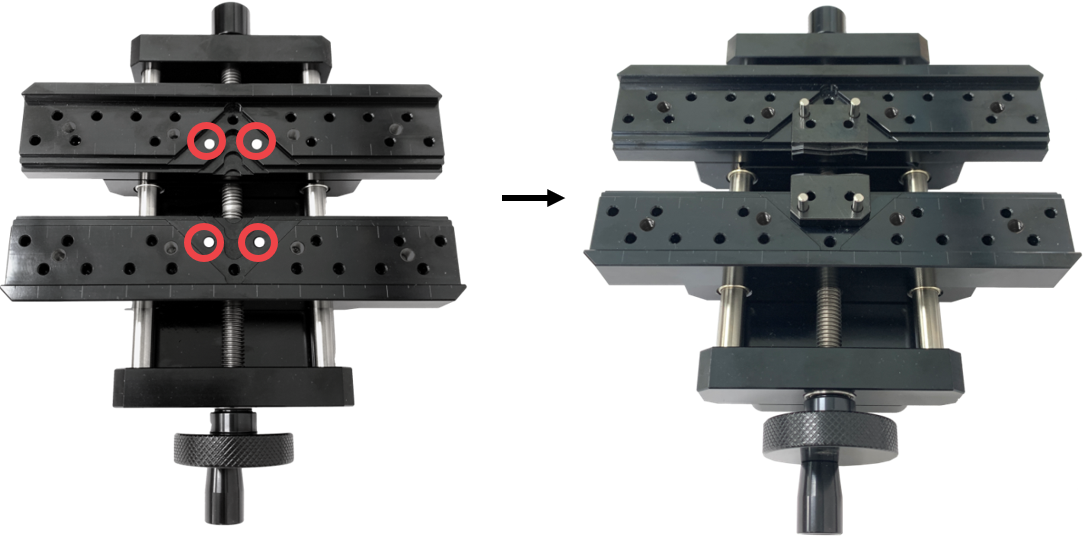
- Turn the clamp over (to the front) then pull out the clamp base.
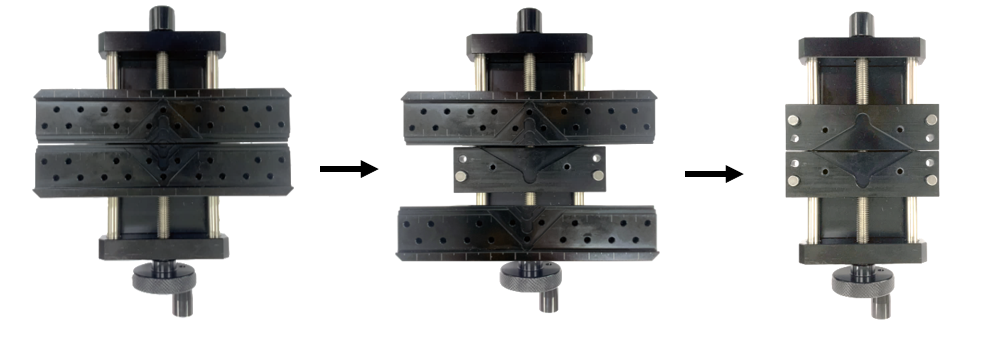
- Remove the clamping pins then secure the material to the V groove of clamp without clamp base. (See picture below for reference).
Height Adjustable Clamp
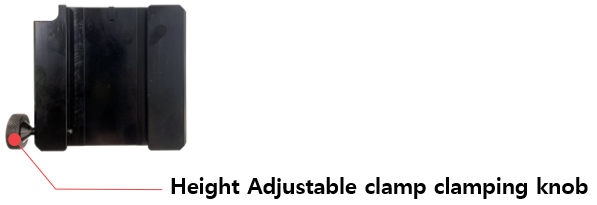
Height adjustable clamp is used to adjust the height of your material.
| Height adjustable clamp (CP-252) |
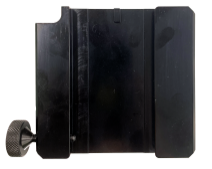 |
1EA | To adjust the height of the clamp. |
- Turn the Height Adjustable clamp clamping knob counterclockwise to detach the Multipurpose Clamp.
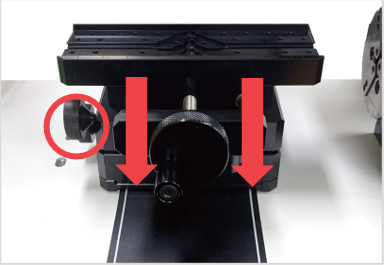
- Turn the clamping knob counterclockwise to detach the height adjustable clamp.
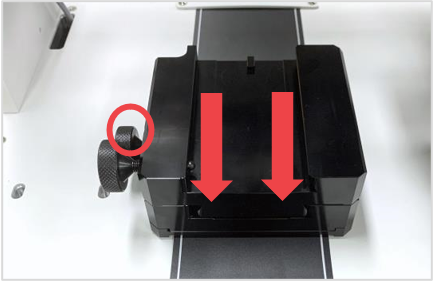
- Attach the multipurpose clamp then fasten it by turning the clamping knob clockwise.
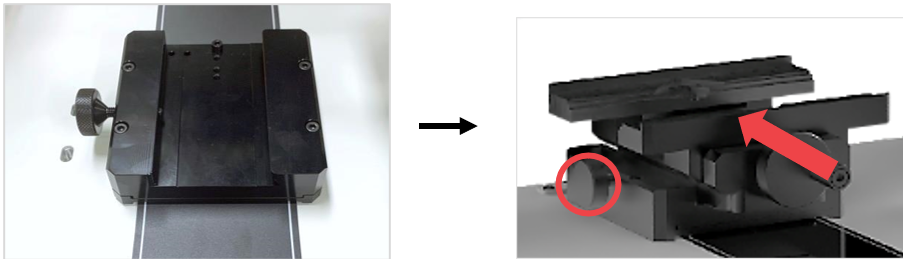
Optional items for Multipurpose Clamp
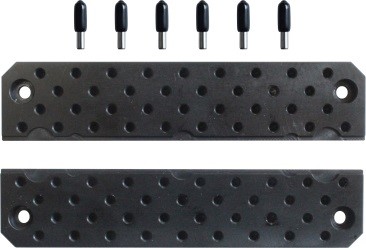
1. Pin clamp
※Optional device; sold separately
| Pin clamp (CP-80) |
 |
1SET | To hold materials with different shapes in place. |
| Pin (CP-172) |
 |
5EA | To hold materials with irregular shapes in place. |
| Wrench bolt (M4x6) |
 |
5EA | To fasten the clamp. |
| L-wrench(3mm) (CP-L30) |
 |
1EA | For tightening/unscrewing the bolt. |
2. Cutlery clamp
※Optional device; sold separately
| Cutlery clamp (CP-83) |
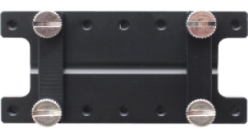 |
1SET | To firmly hold spoons in place. |
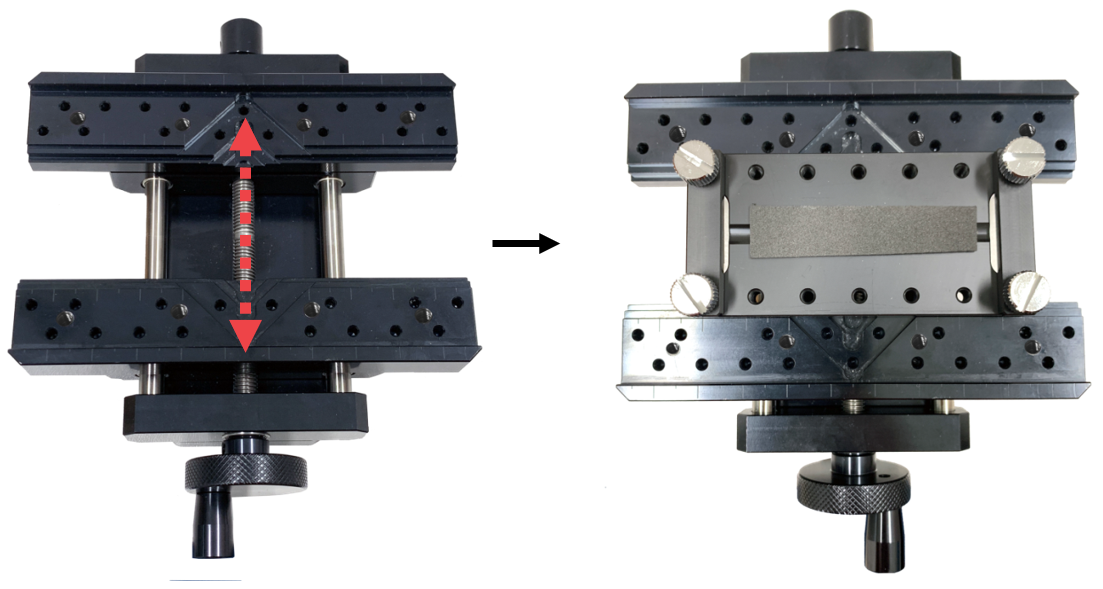
3. Watch adapter
※Optional device; sold separately
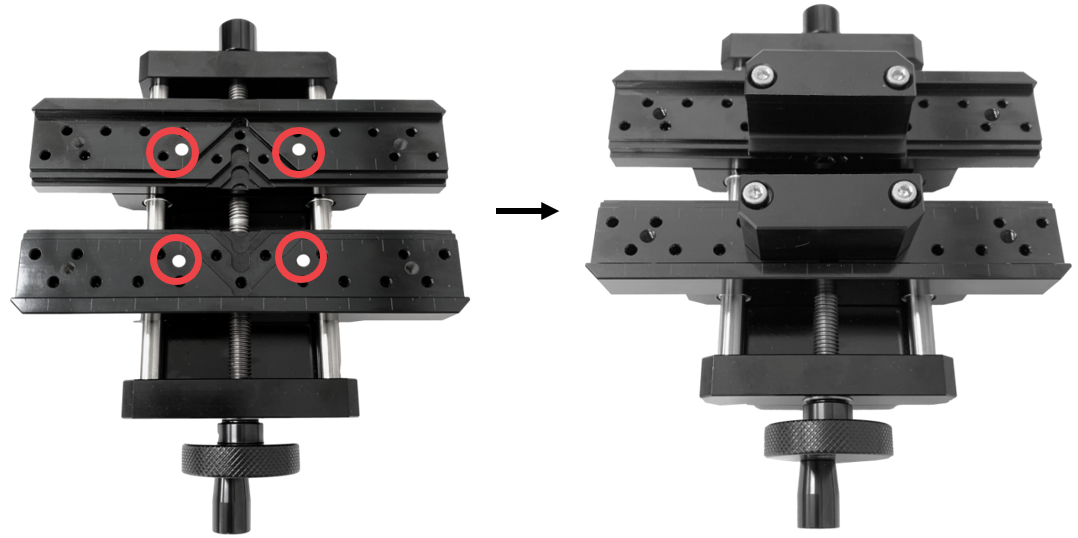
| Watch adapter (CP-84) |
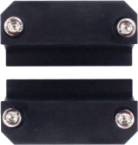 |
1SET | To firmly hold watch in place. |
| Wrench bolt |  |
5EA | To fasten the adapter. |
| L-wrench(3mm) (CP-L30) |
|
1EA | For tightening/unscrewing the bolt. |
4. Bracelet adapter
※Optional device; sold separately
| Bracelet adapter (CP-85) |
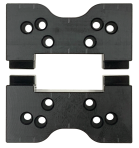 |
1SET | To firmly hold bracelets in place. |
| Pin | 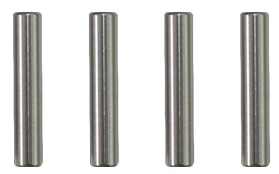 |
4EA | To secure the adapter. |
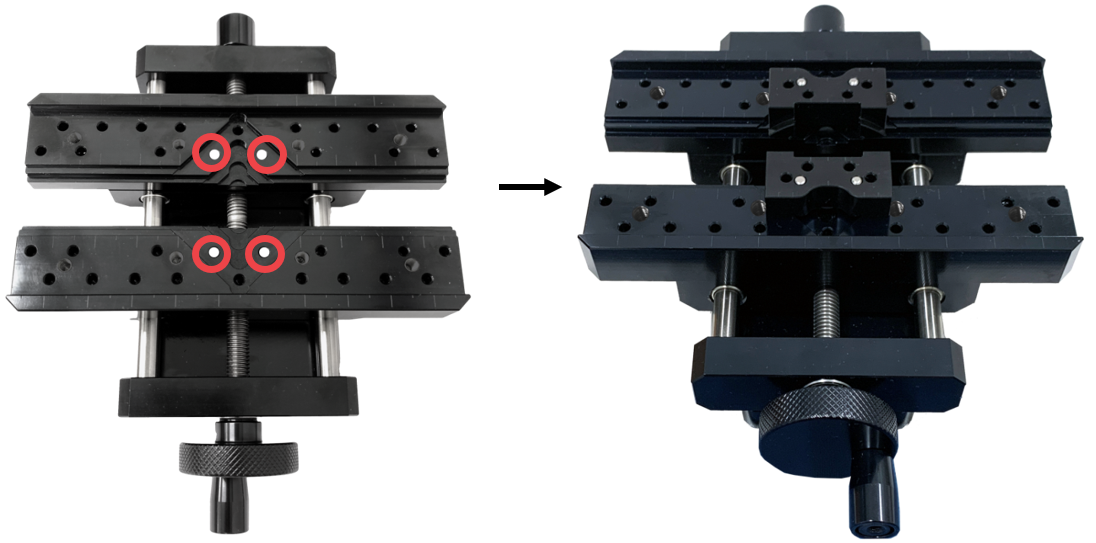
5. Bar necklace adapter
※Optional device; sold separately
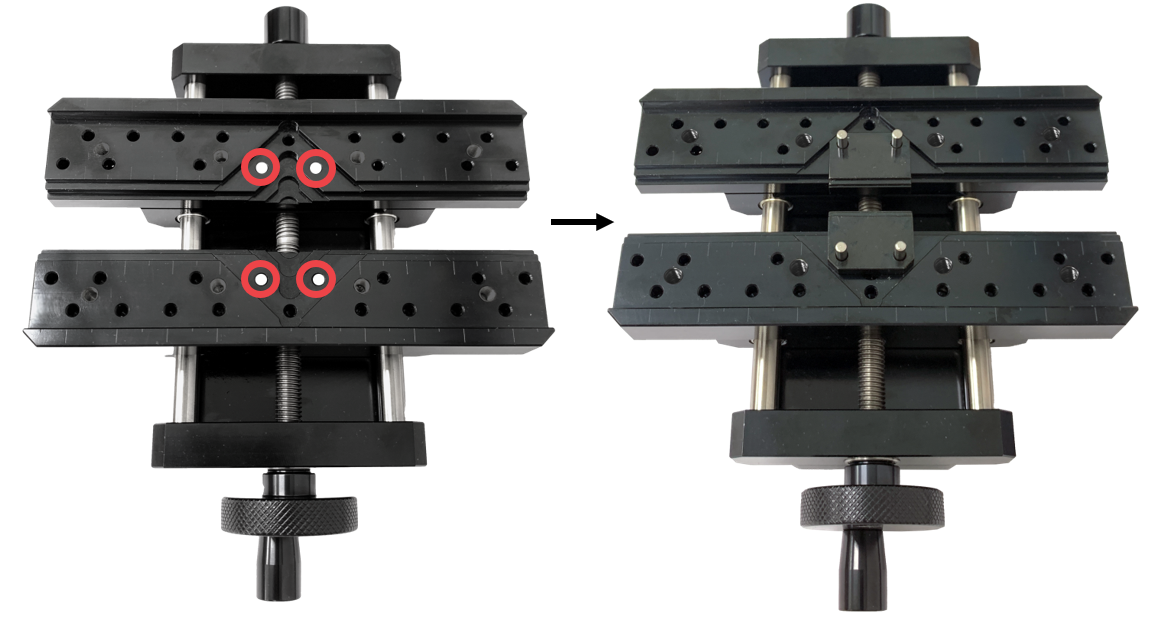
| Bar necklace adapter (CP-166) |
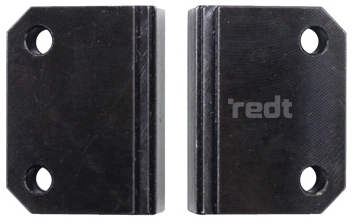 |
1SET | Jig for holding materials with narrow width (about 2-3mm) in place. (Used for securing pendants, bar necklaces, etc.) |
| Pin | |
4EA | To secure the adapter. |
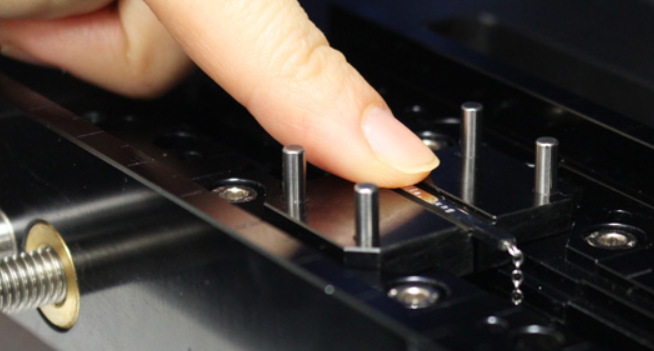
*Materials like bar necklaces or pendants may come off easily when attaching to the jig.
Press the material with your finger to secure it to the jig and be sure to not let your finger get caught while pressing.
6. Brick adapter
※Optional device; sold separately
| Brick adapter (CP-167) |
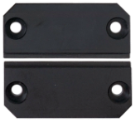 |
1SET | To firmly hold brick in place. |
| Wrench bolt | |
4EA | To fasten the adapter. |
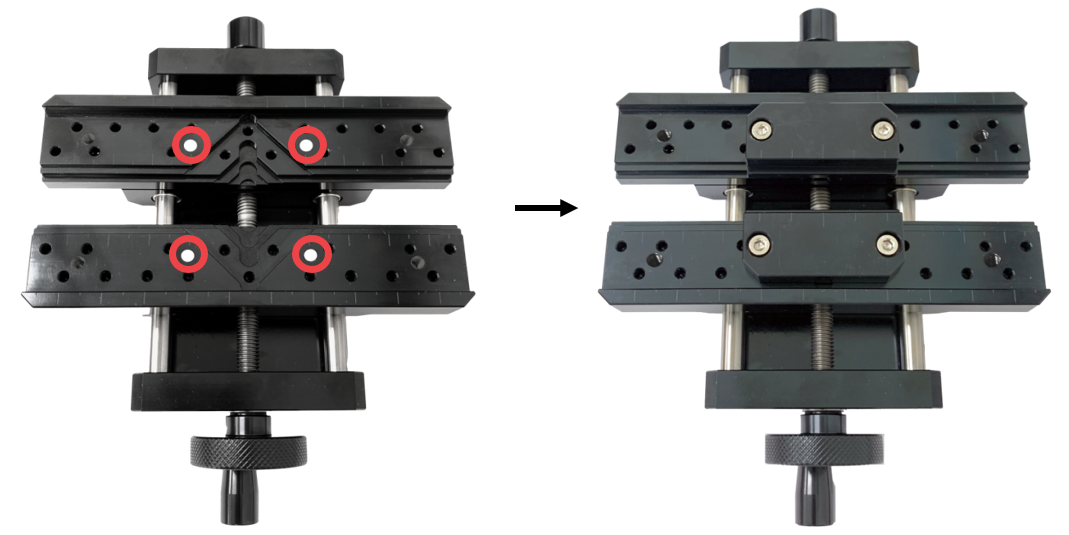
7. Brick adapter (Shallow type)
※Optional device; sold separately
| Brick adapter (Shallow type) (CP-167S) |
|
1SET | To firmly hold brick in place. |
| Wrench bolt | |
5EA | To fasten the adapter. |
| L-wrench | |
1EA | For tightening/unscrewing the bolt. |
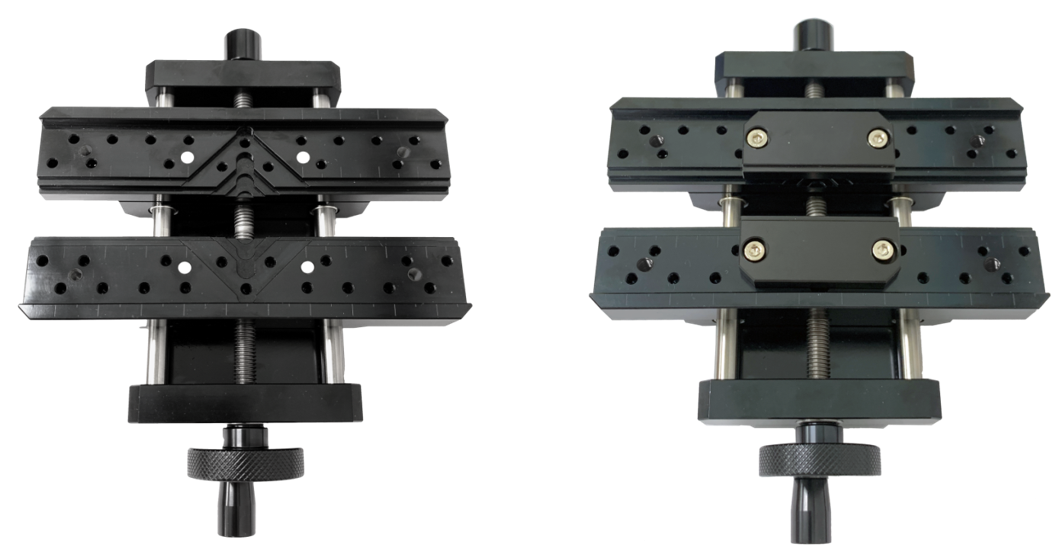
8. Bruch adapter
※Optional device; sold separately
| Brush clamp (CP-169) |
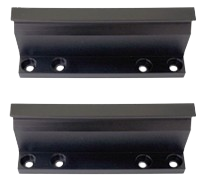 |
1SET | To firmly hold brush in place. |
| Wrench bolt | |
4EA | To fasten the clamp. |
| L-wrench(3mm) (CP-L30) |
|
1EA | For tightening/unscrewing the bolt. |
9. Curved tag adapter
※Optional device; sold separately
| Curved tag adapter (CP-182) |
 |
1SET | Jig for holding curved materials in place. (Used for securing curved pendants, chain bracelets, etc.) |
| Pin | |
4EA | To secure the adapter. |
3) Cutting Clamp
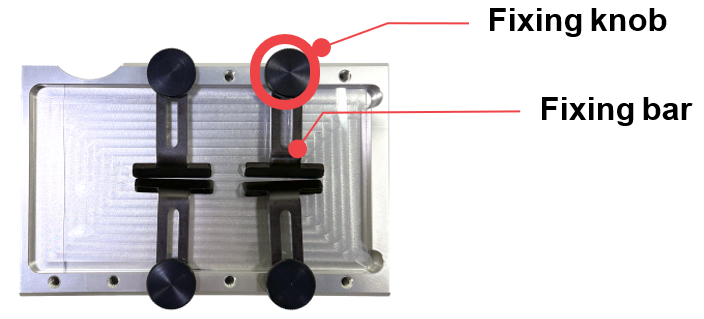
- Place the material on the cutting clamp. Secure the material to the cutting clamp by using the fixing knobs then fasten the fixing knobs with the fixing bars.
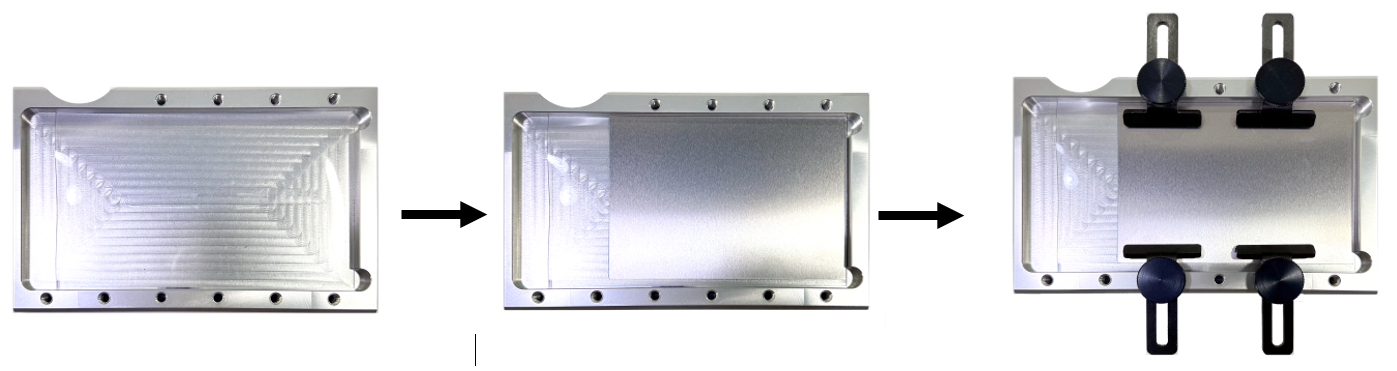
- Fit the cutting clamp on the base clamp then secure it. To loosen or widen the gap for clamping, turn the clamping knob counterclockwise. To tighten or secure it, turn the clamping knob clockwise
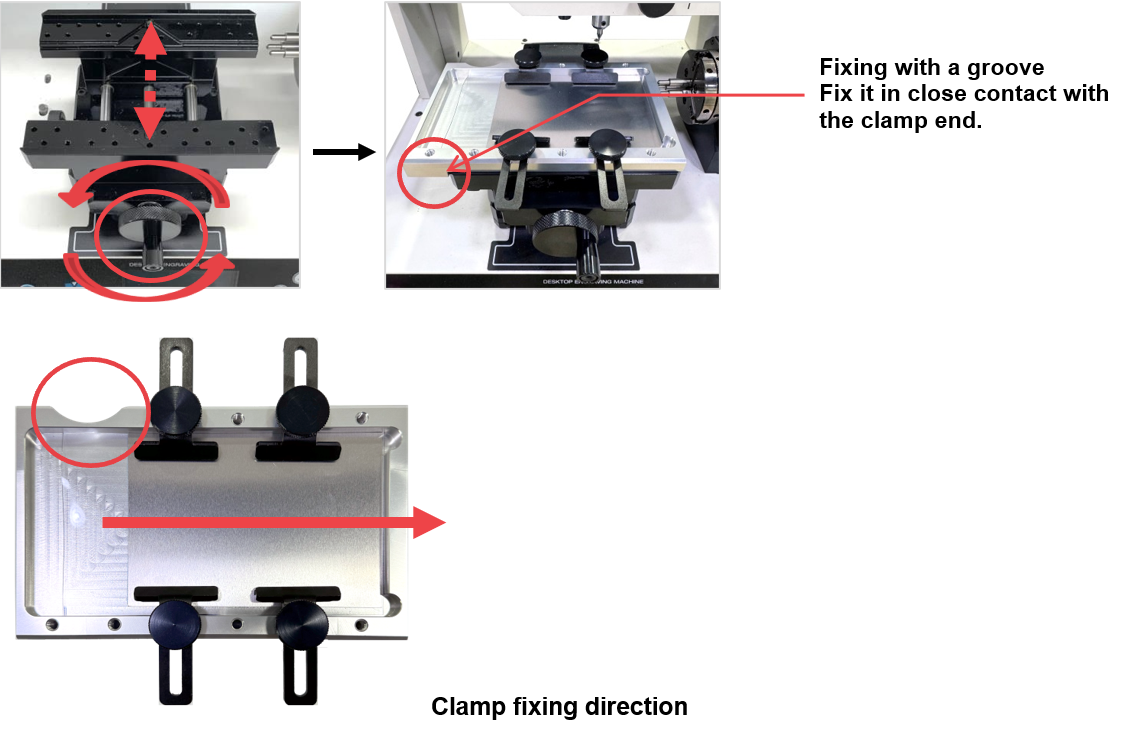
After installing the Height Adjustable clamp, secure the cutting clamp to the clamp.
3. Keypad

 |
Direction Key (X,Y/Z) |
Engraving area adjustment  (X) Moves X axis   (Y)(Z) Moves Y/Z axis |
|
 |
Tool change | 1. Change the tool: Short-press to change tool. 2. Probe calibration: Long-press (for more than 5 seconds) to adjust probe settings. |
|
 |
Vacuum ON/OFF | Chip collector power button • Automatic control: The device starts automatically once the engraving operation begins and stops automatically once the engraving operation is completed. • Manual operation: Automatic control is deactivated if the device is manually switched on. Once the engraving operation is completed, the device should be manually turned off. ※ We strictly advise our users to use the Chip collector during engraving operation for safety. The Chip collector prevents exposure form harmful inhalable particles and debris like metal chips and dusts which may cause eye injury if they get stuck in the eye or respiratory problems if inhaled. |
|
 |
Start | Start marking button • Start marking: Long-press (for 2 seconds) the [Start] button to start marking. • Repeat marking: Press the [Start] button to finish marking, then double-press (tap twice) the [Start] button to repeat marking. • Menu: Press OK when using the menu. |
|
 |
Auto focus | Activates camera auto focus position • Auto moves to view position after height measurement • Refreshes the camera display at MagicEngrave. ※Variety of features available for use once MagicEngrave software is enabled. |
|
 |
Stop | Stops/cancels marking | |
| Press the button while pressing/holding the corresponding button. |
||
|
Pointer On/Off | Laser pointer On/Off |
|
Pointer Calibration | Set laser pointer calibration |
| / |
Change Origin | Current tool position • Another position: Move to the origin • Origin: Move to a different origin (Center ↔ Left-top origin) |
4. Menu
Additional keys and their function
Please consult our engineers first before using these keys to avoid changing their default settings.
First, turn off the MAGIC™-E3 machine.
Next, hold and long-press  button along with the corresponding button (for more than 3 seconds) to activate its function.
Protect your hands, wrists and fingers. Do not let any of your body parts or any foreign objects get caught in the machine during operation. The tools of the machine are sharp, and may cause serious physical injury.
| ➕ |
EEPROM initialization |
| ➕ |
Spindle rotation START/STOP |
| ➕ |
Adjust status LED brightness |
| ➕ |
Adjust focus laser pointer brightness |
| ➕ |
Tool-Pos recording: Records your current location; set whether to activate or not. |
➕ |
Move probe up and down. |
5. Status Indicator
The status indicator is placed at the bottom left side and bottom right side of the machine. It is used to indicate the status of the device.
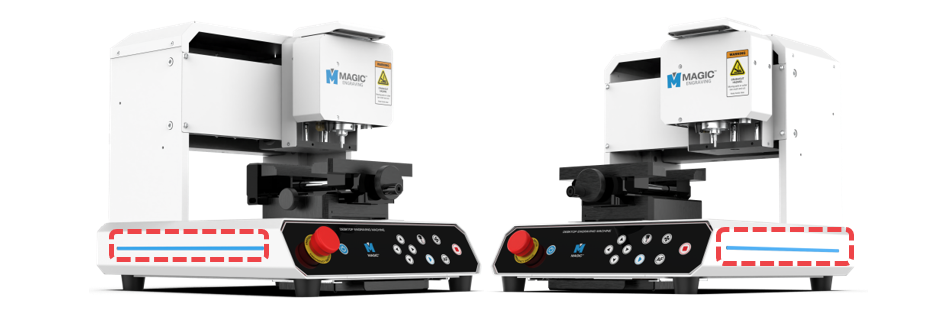
The machine displays flashing or blinking lights to show its current status. The lights displayed indicate the following status:
| Status | Blinking Interval |
| Waiting |  |
| Engraving | |
| Operating |  |
| Notification |  |
| Error |  |
To activate the functions below, turn off the MAGIC™-E3 machine first. Then, long-press the power button while pressing/holding the corresponding direction key (for more than 3 seconds). The function is then activated.
| ➕ |
Adjusts status LED brightness |
| ➕ |
Adjusts focus laser pointer brightness |
Adjust the brightness using the (Direction X) buttons.
6. Tension Tool
| L-wrench(1.5mm) (CP-L15) |
 |
1EA | Tool for tightening/replacement of bolt. |
| Tension tip(4Ø) (T40-TA20) |
 |
1EA | Tool for engraving of material. (For spindle) |
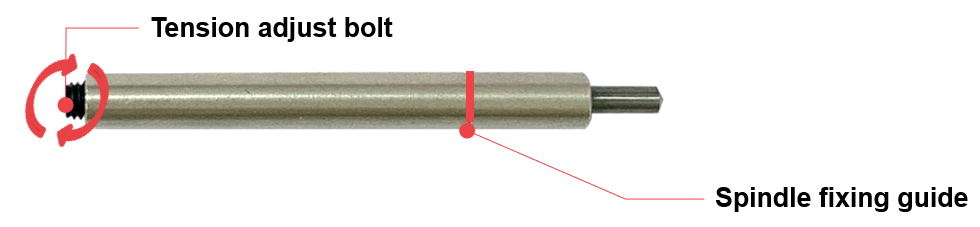
It is necessary to use a tension tool as engraving with a diamond/carbide tip tool requires more pressure.
How to adjust the pressure
When engraving with a tension tool, the engraving depth is adjusted by pressure. This has the same effect as assigning the engraving depth when creating a tool path. To increase pressure, turn the tension adjustment bolt counterclockwise (with a 1.5mm L-wrench). To decrease pressure, turn it clockwise.
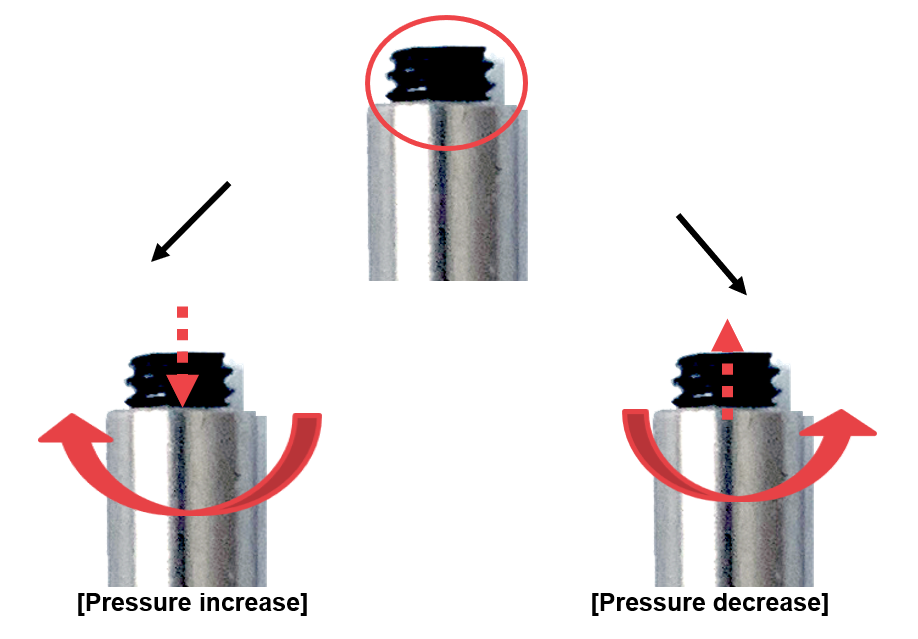
How to assemble the tension tip
First, insert the tension tip (2Ø) into the tip (4Ø). Then, insert the spring. Lastly, insert the bolt then screw it with a 1.5mm L-wrench.
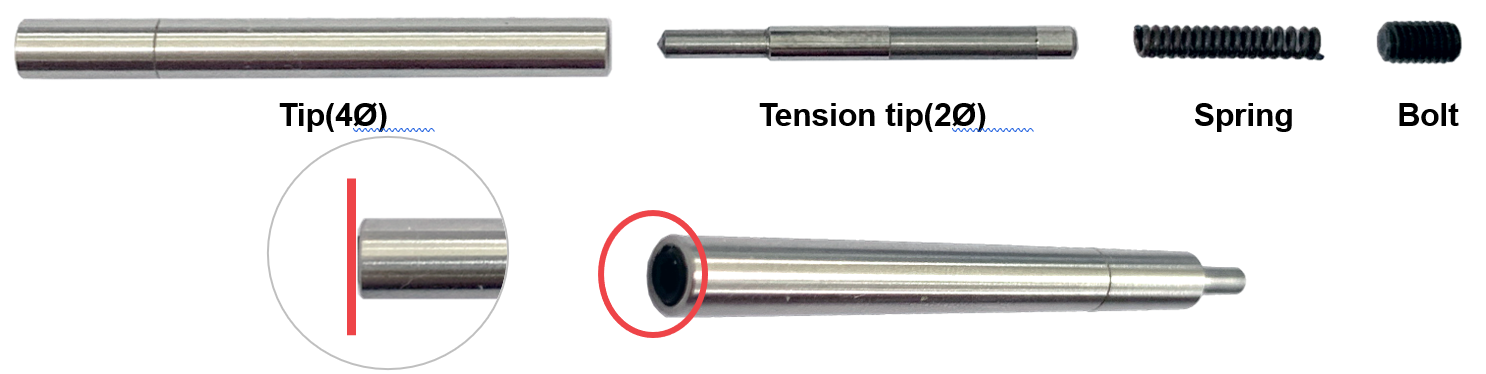
*Be sure to screw the bolt deep until it reaches the tool’s end. The bolt must appear even and/or aligned to the tension tool.
7. Switching Tools

Do not let any of your body parts or any foreign objects get caught in the machine during operation.
The tools of the machine are sharp, and may cause serious physical injury.

Please wear safety glasses during engraving process for safety.
Debris like metal chips and dusts may cause serious eye injury if they get stuck in the eye.
• Spindle
| Name | Picture | Quantity | Usage |
| T-wrench (2mm) |
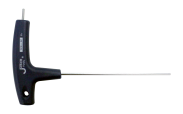 |
1EA | Tool for tightening/unscrewing of bolt. |
As shown below, insert the 2mm wrench into the fixing bolt. Turn the wrench to the left to unscrew bolt. To prevent the tool from falling to the floor, grab tool with your hand then pull it out. Once the tool is removed, replace it with a new tool then secure it using a wrench for tightening bolts. ※See package contents
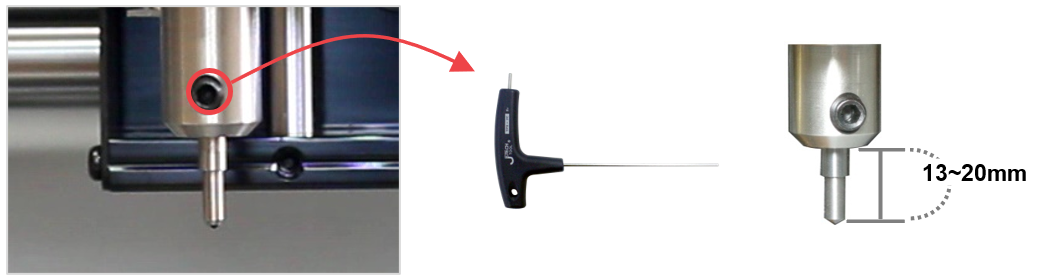
When unscrewing the tool fixing bolt, hold the tool with your hand while unscrewing to avoid the bolt from dropping on the floor.
8. Spindle Belt Replacement
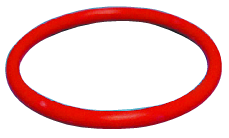 |
The spindle belt transmits the rotational force of the spindle motor to the spindle to enable fast rotation of the blades. Worn out spindle belts cause the surface to crack and slip, causing the spindle motor to fail or function properly. If the force is not transmitted properly, the spindle’s rotational speed will decrease, leading to poor engraving performance and quality. Additionally, a damaged spindle belt has the potential to cause the tool to break. |
• Spindle Belt Size: 40Ø (40mm)
• Replacement Cycle: The lifespan of the spindle belt is contingent upon the conditions of use, but it should be replaced at the latest every two to three months.
Spindle Belt Replacement Method
-
Turn off the MAGIC™-E3.
-
Remove the head cover by unscrewing the four bolts on both sides using a 2.5mm wrench.
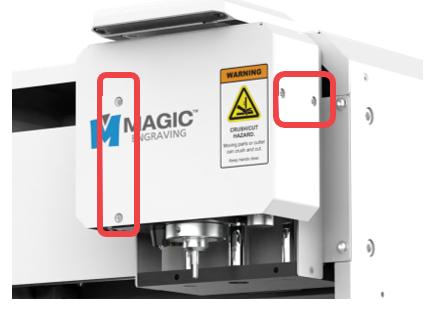
- You will see a red rubber belt attached around the head. Remove this belt then replace it with a new one.
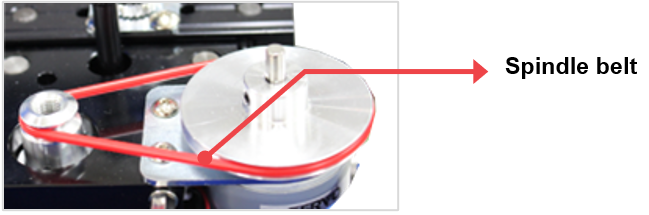
- Put back the head cover then screw the bolts using the wrench. Fasten the L-tool fixing bolt by turning it clockwise.